To easily create operation Screens for electrical model objects, Elipse Power contains a tool capable of importing objects from an electrical model to Screens, the Importer of Objects to Screens, which links these objects to their respective data objects. This tool uses a set of graphical libraries, distributed with Elipse Power, capable of interacting with data objects.
The main function of the Importer of Objects to Screens is to generate the first version of a Screen, because small adjustments may be necessary. This tool does not implement functions for Screen syncing, therefore a second import process using a Screen that already contains objects may result in duplicated data.
To access this tool, right-click the Power Configuration object and select the Electrical Model - Import to Screen(s) option. The Import to Screens Wizard on the next figure is then opened.
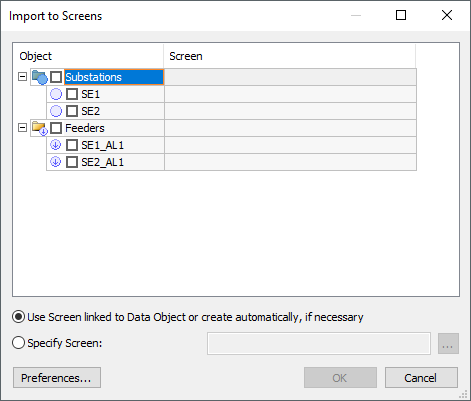
Import to Screens window
This window displays a list of all objects present on the Electrical Model. Users can select one or more items. The Screen column displays all Screens that are already linked to the listed data objects. Users cannot link a Screen to a Schematic View, because there is no data object linked to a View.
If more than one item is selected for importing, only the Use Screen linked to Data Object or create automatically, if necessary option is enabled. In this case, the linked Screen is used for importing the object from the electrical model, if it exists in any project belonging to the Domain. If it does not exist in the Domain, or if there is no linked Screen, a new Screen is then created.
If a single object is selected for importing, users can specify an already existing Screen on the application or create a Screen manually, by selecting the Specify Screen option and clicking ![]() . The window on the next figure is then opened.
. The window on the next figure is then opened.
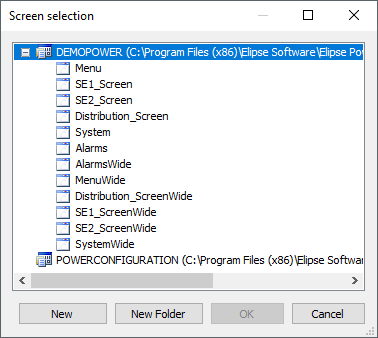
Screen selection window
There are also other settings that can be performed for importing to Screens, by clicking Preferences on the Import to Screens window. The window on the next figure is then opened.
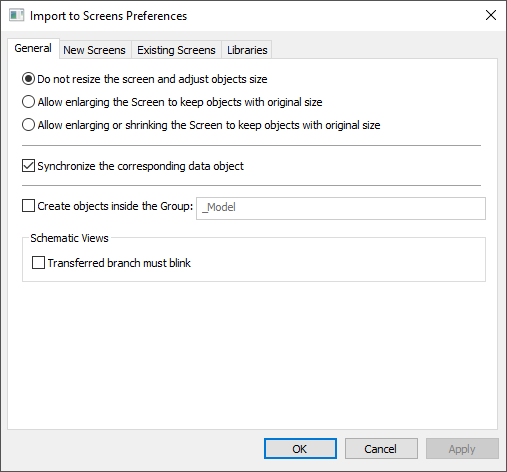
Import to Screens Preferences window
When the import process is performed, it calculates an adjustment factor for the size of Screen objects, so that they all fit on a Screen's visible area. This way, if there is a very large Substation with many objects that is imported to a small Screen, for example, all objects are created on the visible area, however their sizes are probably very reduced relative to what is seen on the graphical library's definition. For this situation, the options on the General tab described next are used.
•Do not resize the screen and adjust objects size: Does not resize the Screen and the size of all Screen objects is adjusted to fit Screen's area. This option is selected by default to keep compatibility with versions earlier than version 4.8
•Allow enlarging the Screen to keep objects with original size: Allows creating an object on the Screen with its original size configured in the library and, for all objects created during the import process to remain visible, the Screen's size is increased if necessary, keeping its original ratio
•Allows enlarging or shrinking the Screen to keep objects with original size: Resizes the Screen's area, keeping the original size of Screen objects. If this option is selected and the Automatically remove all existing objects option on the Existing Screens tab of the preferences window is not selected, the next dialog box is displayed. If users click Yes, all Screen objects are removed and the import process continues. If users click No, the import process is canceled so that users can perform an adequate configuration
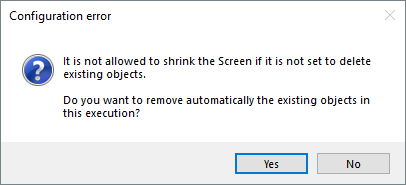
Configuration error when importing to Screens
NOTES |
•If users click Yes on the dialog box displayed on the previous figure, this option is used only at this moment and not saved on the configuration of the Power Configuration object, what is saved is the configuration performed by users on the Import to Screens window. •Elipse Power contains a limit for Screen sizes of 524288 Himetric units. If an object is very large and the calculation for a Screen size exceeds that limit, the Screen is adjusted up to that limit and objects remain smaller than their size on the graphical library. This adjustment on a Screen size always respect the ratio between width and height of a Screen. |
The Synchronize the matching data object option forces a syncing on the selected data objects, ensuring that Screen objects have a corresponding data object. If the import process is for a Container- or Grouper-type object (Feeders, Photovoltaic Power Plants, Substations, Transmission Lines, or Wind Power Plants), this object's syncing is performed from the selected object and also from all their children, before starting the import process to Screens. For Schematic Views, this syncing is partial, that is, only for the object that is currently imported (specifically a Breaker or a Switch, in addition to the parent object). In this case, this syncing is performed during the import process to a Screen of the Schematic View. In both cases, before starting the import process, a syncing on the existing data objects on the application is performed, to ensure that all data objects of the application still have a valid corresponding object in the electrical model. Those that do not have a corresponding object have their IDs zeroed. For more information about this syncing option for existing objects, please check topic Synchronizing Existing Data Objects.
NOTE |
If these data objects were already imported, it is advisable to select this option. |
The Create objects inside the Group option allows all Screen objects to be created inside a single group of controls, whose suffix is informed in this option. Selecting this option disables the Warn that the Screen already has objects, Automatically remove all existing objects, and Keep existing objects and rename new ones options, and also enables the Remove automatically objects from the configured group option on the Existing Screens tab, described next. This behavior allows that, in case of successive importing processes, only the objects created inside the indicated group are removed automatically.
NOTE |
The Create objects inside the Group option is deselected by default for applications created in versions earlier than version 5.0 and it is selected by default for applications created in version 5.0 or later. |
The Transferred branch must blink option allows configuring whether the transferred Branch must blink or only indicate with the color of this transferred Branch in Schematic Views.
The New Screens tab allows settings relative to the creation of new Screens.
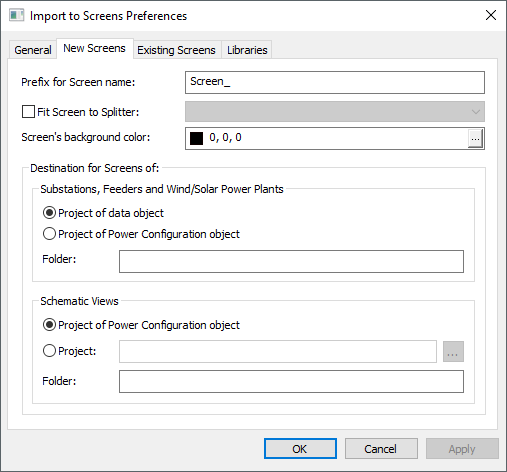
New Screens tab
On this tab, users can configure the following aspects:
•Prefix for Screen name: Allows selecting which prefix is used to compose the name of the Screens to create. Names of Screens are generated by concatenating this prefix, which cannot be empty, with the object's name
•Fit Screen to Splitter: Allows selecting a Splitter among the ones on the application so that new Screens have their size adjusted relative to that Splitter
•Screen's background color: Allows selecting the value of the BackgroundColor property of the Screens to create
•Destination for Screens of Substations, Feeders and Wind/Solar Power Plants and Destination for Screens of Schematic Views: Allows selecting the project and folder where these Screens are created. If the import process is for Substations, Feeders, Wind, or Solar Power Plants, users are only allowed to select between data object's project or Power Configuration's project. If this data object syncing is not enabled, users are not allowed to close this window with the option to create Screens on the selected data object's project. If the import process is for Schematic Views, users can select between Power Configuration's project or a specific project, which must belong to the Domain. In both cases, if a folder or folder path is informed, they are created if they do not exist, always starting at the selected project's root
If the Screen used in the import process already exists and contains objects, this process may generate an overlapping. Select the Existing Screens tab to perform the configuration relative to the import process to existing Screens.
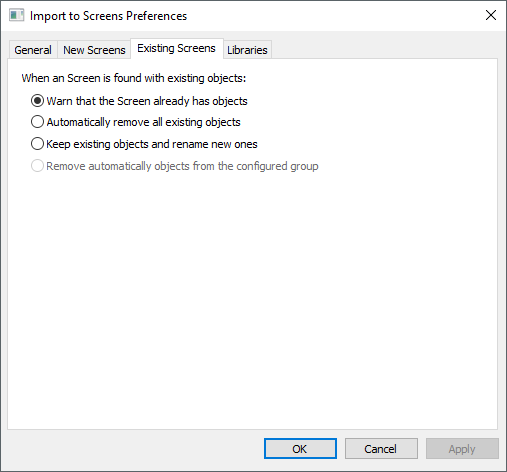
Existing Screens tab
On this tab, users can configure the following aspects:
•Warn that the Screen already has objects: In this case there is a dialog box warning users that the import process may generate an object overlapping. The duplicated objects can be any object inserted on a Screen, and not only objects related to Elipse Power's importing to Screens. Therefore, if the Remove option is selected, for example, all existing objects on a Screen are removed, regardless of their type
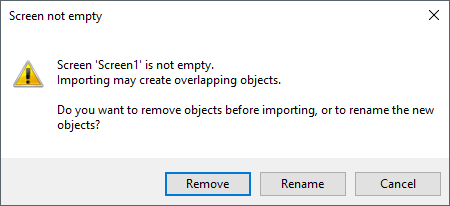
Warning about overlapping objects
•Automatically remove all existing objects: In this case all objects are deleted without any user confirmation
•Keep existing objects and rename new ones: Objects are kept and, in case their names are equal to the names of the objects to create, these new objects have their names automatically incremented
•Remove automatically objects from the configured group: Automatically removes all objects created in the group indicated in the Create objects inside the Group option on the General tab
These settings are saved on the Power Configuration object. If there are inconsistencies, such as if the selected Splitter does not exist anymore or if the selected project does not belong to the Domain anymore, error messages are displayed to inform users. After finishing these settings, click OK to start the import process.
If the Synchronize the matching data object option is selected, there is a check on data for the selected object. If this data was already imported, there is only a syncing on this object. Otherwise, a window with configurations for data import is then opened, and these settings must be performed before proceeding with the import process to Screens. For more information about possible settings of data importer, please check topic Synchronizing Data Objects.
The Libraries tab allows settings relative to the usage of the available graphical library. Default is to use the PowerControls.lib library by Elipse Software. However, if needed, users can use a customized library with graphical objects.
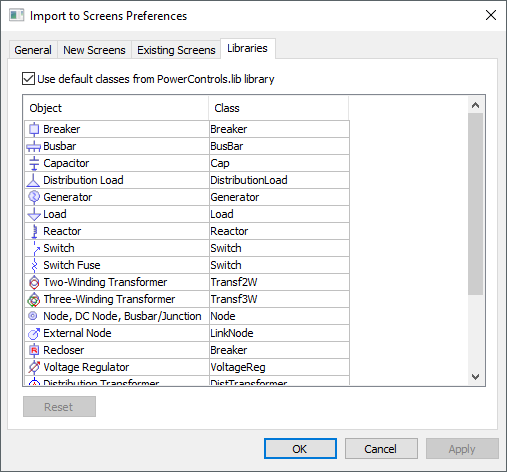
Import to Screens Preferences window
By deselecting the Use default classes from PowerControls.lib library option, users can edit the list of objects and classes and individually select other XControls for use on the import process. All settings are saved to the Power Configuration object, even those settings that are not visible.
To configure classes for these objects, select the desired object and click ![]() . The window on the next figure is displayed to select a new XControl.
. The window on the next figure is displayed to select a new XControl.
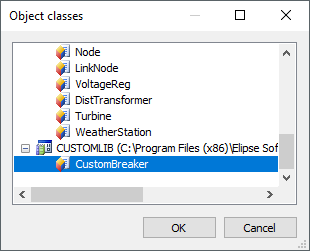
Object classes window
According to the selected object, a check is performed to ensure that this selected new XControl meets the minimum requirements for use with the Importer of Objects to Screens tool. For more information, please check topic Customizing Libraries.
Every object found on the Electrical Model is mapped to a corresponding graphical object and linked to a data object, therefore ready for use. Exceptions are the Bay object, which does not have a graphical representation, and the Connector object when representing a jumper that, because it is only a connection with null resistivity among devices, does not have a corresponding data object. This way, this Screen object is linked to one of the object's terminals to which it is connected, allowing it to receive information from Power Flow and Topology Processor modules.
Users can also import objects directly to a specific Screen, if needed. To do so, right-click the desired Screen and select the Import from Electrical Model option, as shown on the next figure.
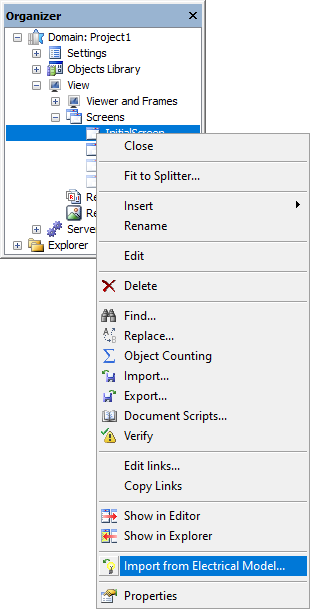
Import from Electrical Model option
This Screen must belong to the Domain, otherwise this option appears disabled. If the Domain does not have a Power Configuration object, if there is more than one object of this type, or if the object found does not have a configured electrical model, users are informed via error messages and the Screen objects import process is canceled.
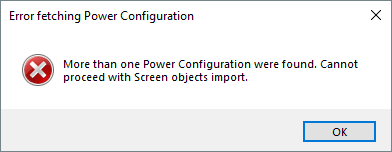
Error window when importing to Screens
If a Power Configuration object is found with a correctly configured electrical model, the window on the next figure is then displayed, allowing users to select an object to import.
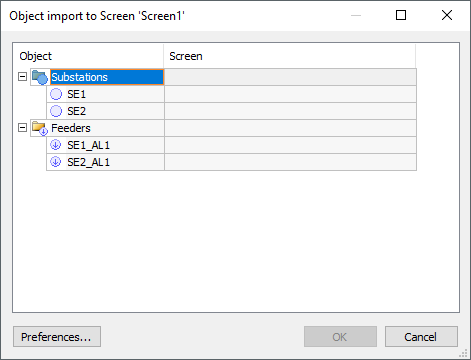
Object import to a Screen window
NOTE |
Users are allowed to select a single object, which is imported to the Screen where this window was opened, but it is not imported if that Screen was already used for importing other object and is linked to that object. The link to the old object is not broken. |
On the Import to Screens Preferences window, settings related to the graphical library can be set normally. When this tool is opened from a Screen, the New Screens tab is not available.
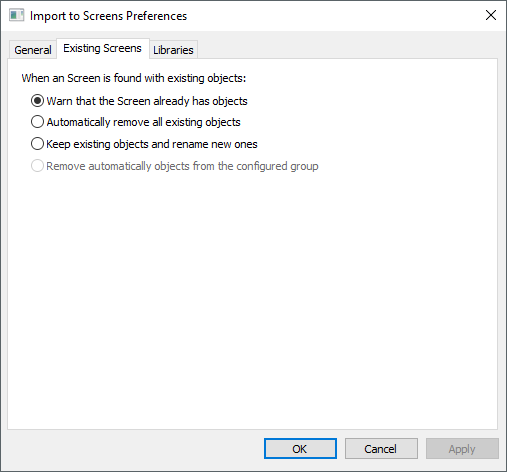
Import to Screens Preferences window
After configuring the Importer of Objects to Screens, click OK to start the import process. The window on the next figure shows the progress of the import process of objects.
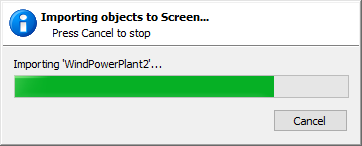
Progress window when importing objects to Screens