Every tank must have an alarm monitoring its level information.
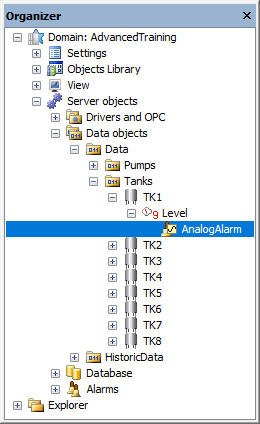
1.Insert in the instances of XFolder XF_AnalogMeasurement (Level) an Analog Alarm.

Analog Alarm
NOTE |
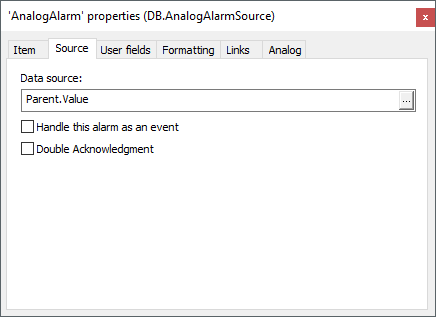
When creating this Alarm, the Source property is automatically configured to monitor the Value property of the Level object, according to the next figure. |

Data source of an Analog Alarm
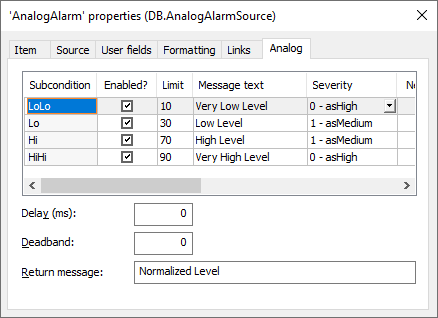
2.Configure the levels and messages of the Analog Alarm as desired.

Configuration of the Analog Alarm
3.In the Level object, change the IsAlarmArea property to True.
4.Repeat the previous steps for all Level objects. Users can drag the Alarm created to another Level object with the CTRL key pressed to copy the Alarm.
NOTE |
Do not forget to configure the IsAlarmArea property of all Level objects to True. |
Every pump must show when it is turned on or off.
1.Insert in the XObject XO_Pump an Alarm Configuration object.
2.In the AlarmConfig1 object, insert a new Area named "Pumps".
3.In the Pumps Area, insert a Digital Alarm for the XO_Pump.Speed property.

Digital Alarm
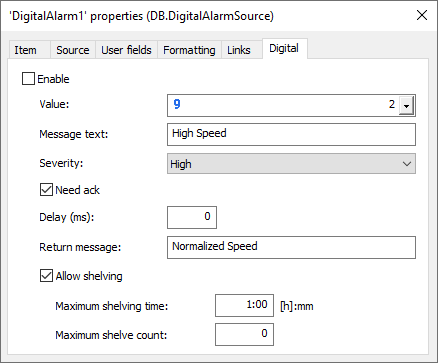
4.On the Digital tab of this Alarm, configure the Value option to 2 (two) and the Alarm messages as desired.

Configuration of the Digital Alarm
NOTE |
To change the Value option to 2 (two), change this option's data type to Integer. |