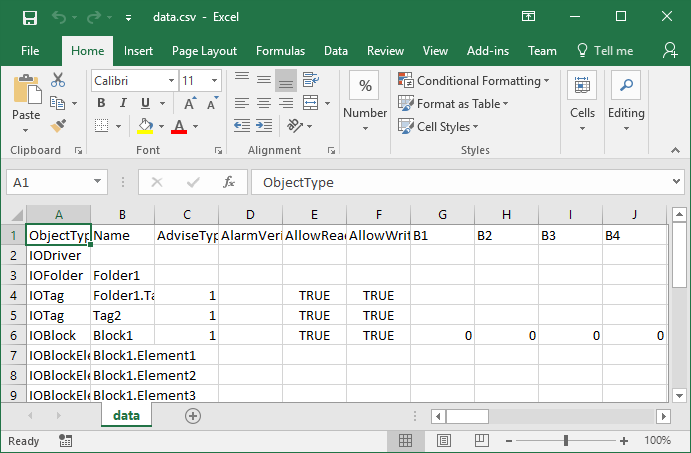
Users can generate a CSV file using Notepad, Excel, or any other Windows application. This file is created considering the Windows-configured element separator (the user-based configuration, not system-based).
The first row in this file must contain a header with column names. Each column must be a property or an identifier defined in the template, as seen next. Objects must be placed on rows, and property values on the corresponding columns. Not all object properties should be listed on the header, nor should all columns be necessarily linked to properties of a given object.
It is also important that this CSV file contain a column for the Name property. Without this column, it is not possible to determine where exactly that object must be created. Names display the object's correct hierarchy, and names with special characters must be delimited by brackets. If an object's name starts with numbers, this name must be also delimited by brackets.
Next, there is an example of a CSV file that can be manually created in Excel.
1.Open Excel and set the header with the following fields, one for each column, according to the next figure.

A CSV file viewed in Excel
2.Save this spreadsheet with a .csv extension.
3.Close this file in Excel.
4.To import this file in E3, select an IODriver object and import the generated file using the Import option, selecting the proper template. E3 then creates the structure according to the CSV file.