The virtual adapter is a non-physical network adapter installed on Windows, with the objective to provide a single interface for the IEC 61850 driver (or even other protocols) independent of which physical network (A, B or both) are active.
Installation
The simplest way to install a virtual adapter is explained next, for Windows 10.
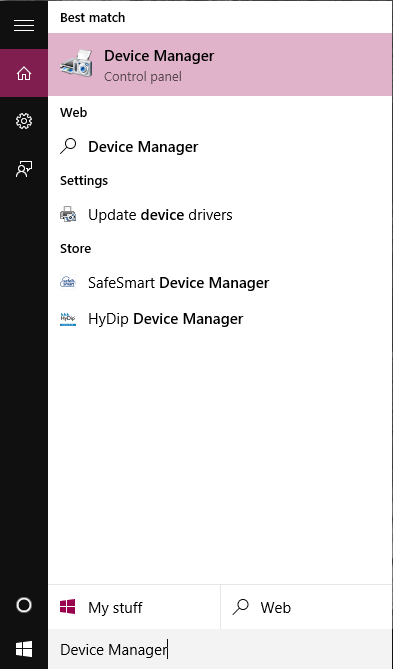
On search bar, besides the windows Icon, type "Device Manager", selecting this program.
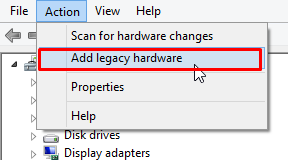
Select the Action - Add legacy hardware option.
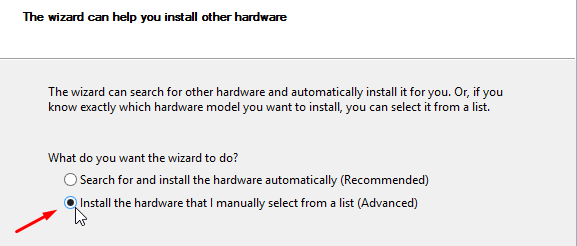
At the "Add Hardware" window, click at "Install the hardware that I manually select from a list (Advanced)" and after that click on Next.
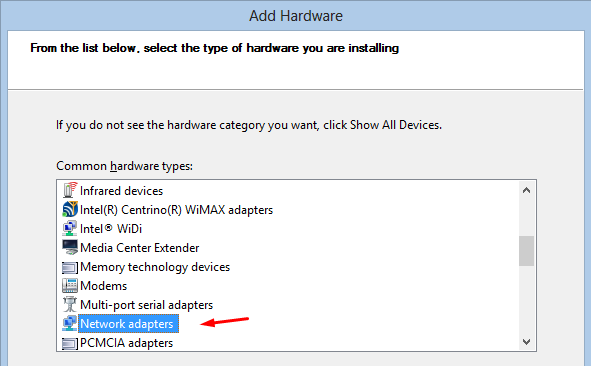
Now choose “Network Adapters” and select Next.
5: Select “Microsoft” at left panel. Next, choose Microsoft KM-TEST Loopback and hit Next until finish.
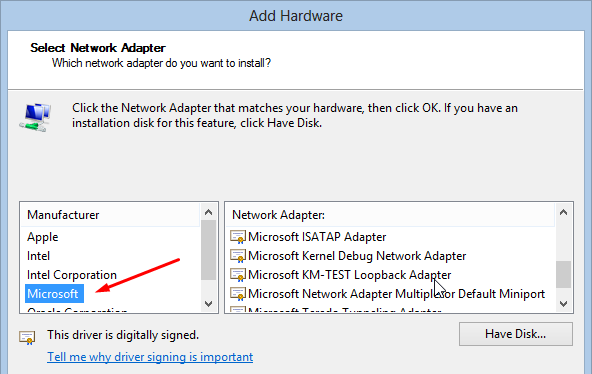
It is also possible to use the Virtual Adapter offered at NPCAP install, but it is a shortcut to the adapter above - Microsoft (KM-Test Loopback Adapter) . You can choose this option at the installed obtained at: https://nmap.org/npcap/.
Configuration
Once the virtual adapter is installed, users must enable at the adapter the usage of the sniffer library npcap and define a fixed IP address.
To do it, go to Control Panel - Network and Internet - Network Connections, where all connections are exhibited. Select the Virtual Adapter properties.

At the adapter properties window, enable the minimum number of options, in order to decrease the network traffic to the IED network. The main options to enable shall be Npcap Packet Driver and TCP/IPv4.
Select TCP/IP properties and inform a valid and fixed IP Address to access the IED network.
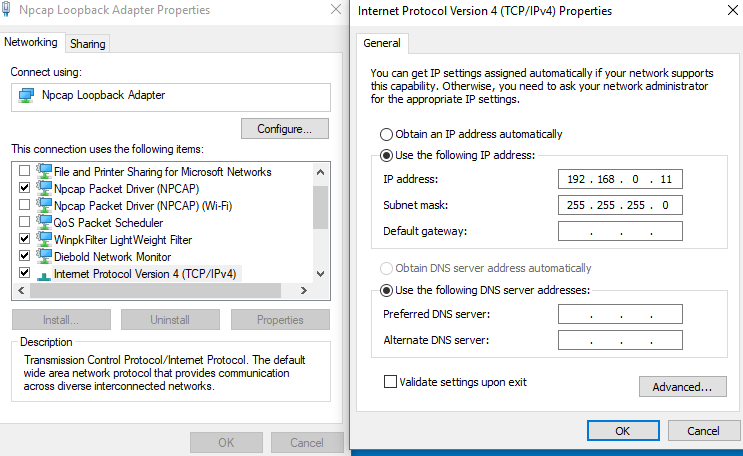
Click at OK and apply the changes.
Associate the Virtual Adapter to this Driver
In order to assure that 61850 MMS messages will be directed only to the virtual adapter and not for other adapters, it is necessary to select this interface for the driver.
There are 2 ways to do it. First one is defining manually which adapter shall be used by the driver. The second one is using the property "ServerName/Interface List" at PRP tab, with a list of ServerNames and respective Interface IP Addresses.
Fixed Virtual Network Adapter Configuration
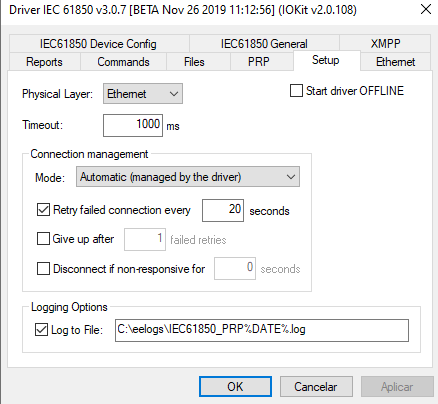
To define a fixed network adapter, open driver configuration, and at the Setup tab, set Physical Layer as "Ethernet".
Then, on Ethernet tab, select the option "Interface" and choose at the list, the IP Address that was defined for the Virtual Adapter. If this step is not performed, the service will not start!
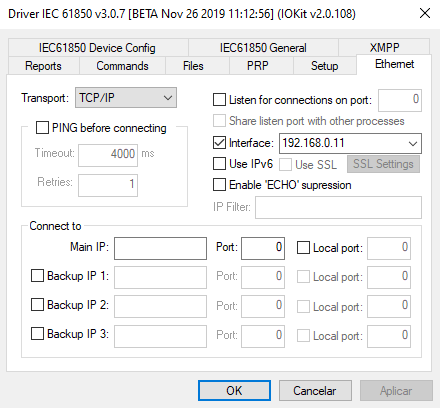
Finally, return to the Setup tab and put back the Physical Layer to "None". Click on OK and Save the driver.
Dynamic Virtual Adapter Definition
At PRP tab, on "ServerName/Interface List", inform a list of Server Names (DNS) and it´s corresponding IP Addresses at the format ServerA:IPA;ServerB:IPB , so the same PRJ file with this driver can be used without changes in at least 2 computers. When the driver starts, it checks the local computer name against the list, and if there is a match, it sets the corresponding interface as the adapter.
Important Observations
NOTE1: If other computers running this PRP Service are on the same network(s), it is necessary to define a different MAC Address for each virtual adapter on each computer. This is because the Virtual Adapter is installed with a standard MAC Address, which will be identical in all computers. To change the MAC Address, we shall open the adapter properties and click at the "Configure" button. Select the tab "Advanced" and at the option "Network Address" define the new MAC Address, using a 12-digit hex string.
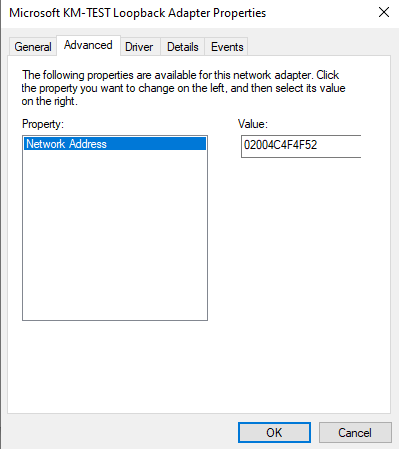
NOTE2 : Due to a virtual adapter behavior, if you disable the adapter on windows, during the execution of the PRP Service, and enable it again, it is necessary to restart the service to make it work again.